Flash and Run
After building your application, flash the firmware to your board from the "Applications" view.
Flash an application
- Click on the Flash button (run icon) next to the application, or
- Right-click on the application > Flash/Run.
Both run west flash in a terminal, with the board and build directory of the build configuration:
west flash --board <board> --build-dir <application>/build/<config name>
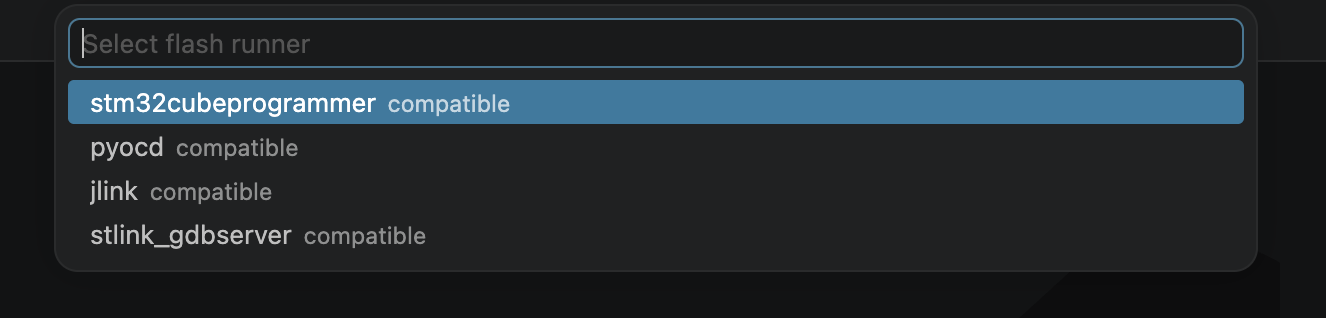
- If no default runner is set, a "Select flash runner" picker opens. It auto-suggests the runners that are compatible with your build (marked "compatible"), so you do not have to know which programmer your board uses. The choice applies to this flash only.
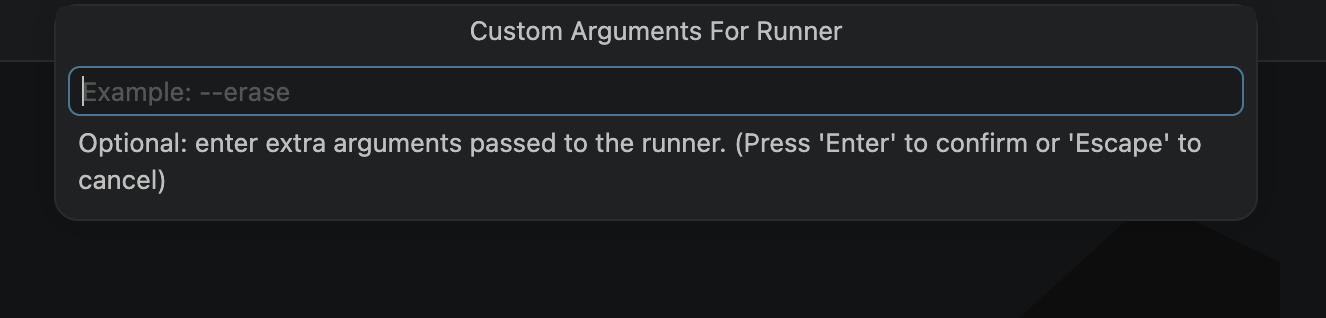
- After you pick a runner, a "Custom Arguments For Runner" input lets you pass extra arguments to the runner if you need them (for example
--eraseto erase the flash before programming). It is optional: leave it empty and press Enter to flash with the defaults.
- If a default runner is already set for the configuration,
--runner <name>and any saved custom arguments are added automatically and neither prompt appears. Set a default runner to skip the prompts every time.
If the application has several build configurations, flashing from the application row targets the active configuration. To flash another configuration, use the Flash button on its own row, or right-click on the configuration > Flash/Run.
The runner tool itself (OpenOCD, J-Link, a vendor programmer) must be installed on your system. See Install Runners.
Set a default flash runner
To always flash with the same runner without being prompted:
- Right-click on the application > Build Configuration > Set Default Flash Runner.
- If the application has several build configurations, select the configuration to configure.
- Select the runner in the list. Runners declared by your build are marked "(compatible)" and listed first.
- Optionally enter extra arguments in the "Custom Arguments For Runner" input (for example
--eraseto erase the flash before programming). They are passed to the runner on every flash. Leave the field empty and press Enter to skip.
The runner and arguments are saved per build configuration.
Build the configuration first: the list of compatible runners is read from the build output. On an unbuilt configuration, collecting the runners can take a while or fall back to a generic list.
The "Flash runner" row
Expand the application (or a build configuration) in the "Applications" view to see the "Flash runner" row. It shows the default runner name, or [not set].
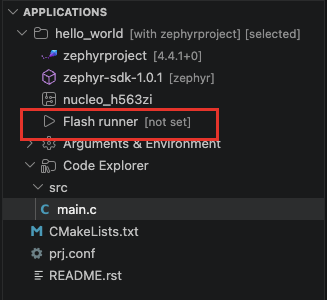
From this row you can:
- Click the
+icon ("Set Default Flash Runner") when no runner is set. - Click the edit icon ("Change Runner") to pick another runner.
- Click the remove icon ("Remove Default Runner") to go back to the flash-time picker.
- Right-click for "Change Runner", "Set Custom Arguments For Runner", and "Remove Default Runner".
When custom arguments are set, a "custom arguments for runner" row appears below with the current value. Right-click it for "Change Custom Arguments For Runner" and "Remove Custom Arguments For Runner", or click its remove icon to clear the arguments.
Flash runner and debug runner
The default flash runner only affects west flash. Debugging uses its own runner, selected in the Debug Manager (see Debug Session). Both kinds of tools are installed from the Install Runners panel.
Flashing from the command line
Everything above is a convenience layer over west flash. You can always flash from a terminal instead, which is handy for scripting or for options the UI does not expose.
Right-click on the application > Open Terminal to open a Zephyr Workbench terminal: it already has the workspace environment and all the environment variables loaded, and it opens in the build directory (or the application folder if it has not been built yet). From there, run west directly:
west flash --runner stm32cubeprogrammer --erase
See the Zephyr Flashing and Debugging documentation for the full list of runners and options.