West Workspace
The West Workspace is a folder that contains the .west subdirectory and the west manifest repository. It specifies the location to clone the Zephyr sources, as well as the module and application projects. The West Workspace is created using west init and populated using west update.
For more information about west workspaces and their topology, please refer to the Zephyr Project documentation.
Add a West Workspace
To open the wizard, use one of these entry points:
- Click Add West Workspace in the "Workbench for Zephyr" shortcuts view.
- Click the + button in the title bar of the West workspaces view.
- If the view is empty, click the Initialize workspace link.
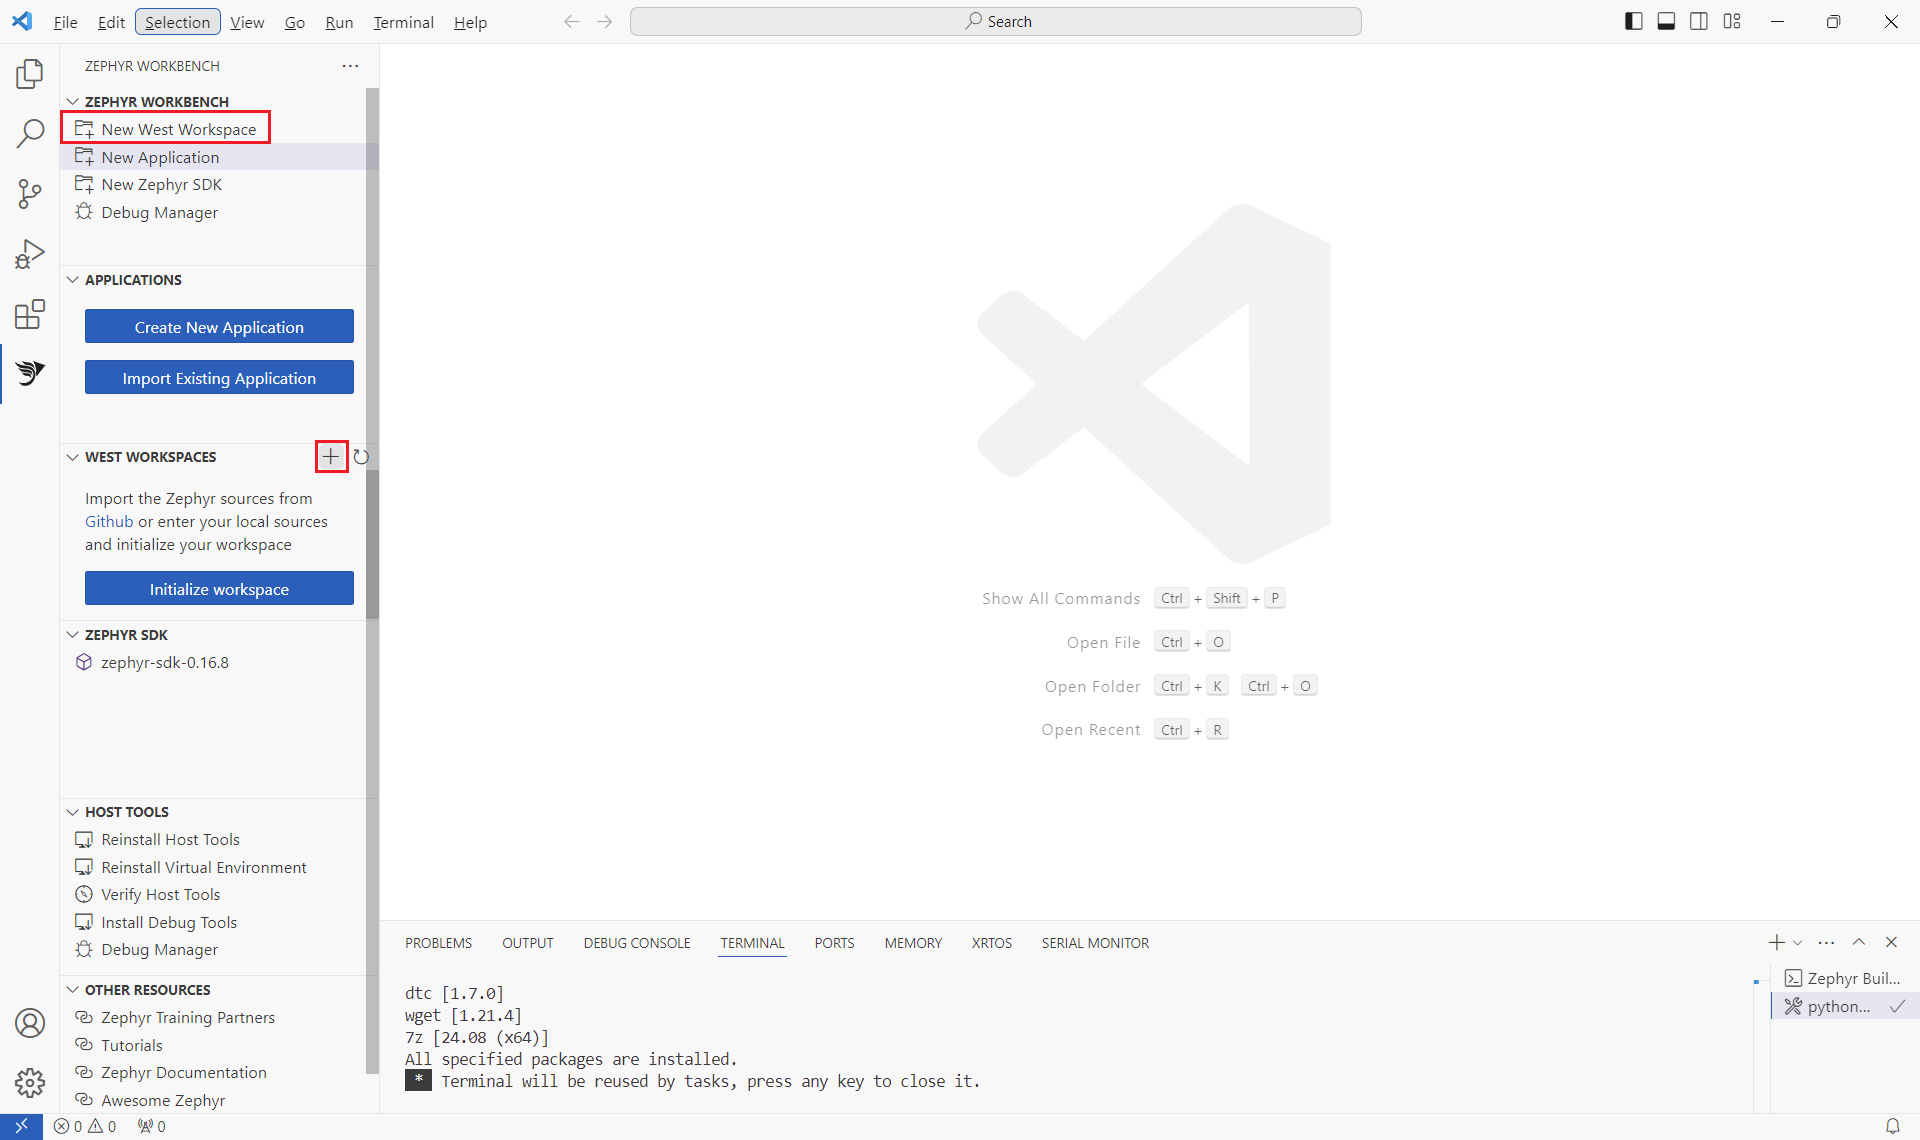
The host tools must be installed first. If they are missing, the wizard does not open and a notification offers to install them.
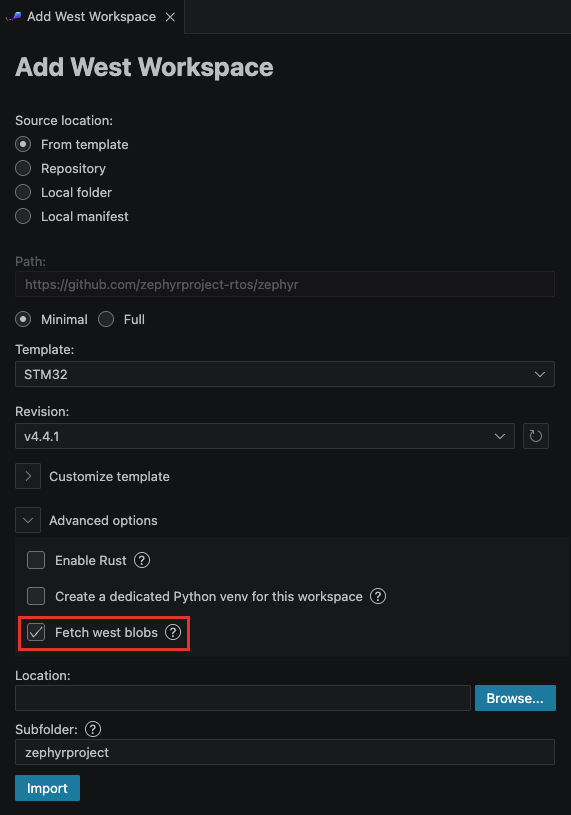
Source location
Pick where the workspace comes from:
- From template (default): generate a manifest from a built-in template, then fetch the sources.
- Path: shows the Zephyr repository the sources come from. It is fixed in this mode.
- Minimal (default) or Full:
- Minimal fetches Zephyr plus only the modules needed for the selected vendor template. Faster to download and update.
- Full imports every Zephyr module, like the upstream default workspace.
- Template (Minimal only): select the vendor. Available templates: STM32 (default), NXP, Silicon Labs, Texas Instruments, Espressif, Infineon, Analog Devices, Microchip, Altera, Ambiq, Atmel, Ethos-U, GigaDevice, Intel, Nordic, Nuvoton, OpenISA, QuickLogic, Renesas, Raspberry Pi Pico, Telink, Würth Elektronik.
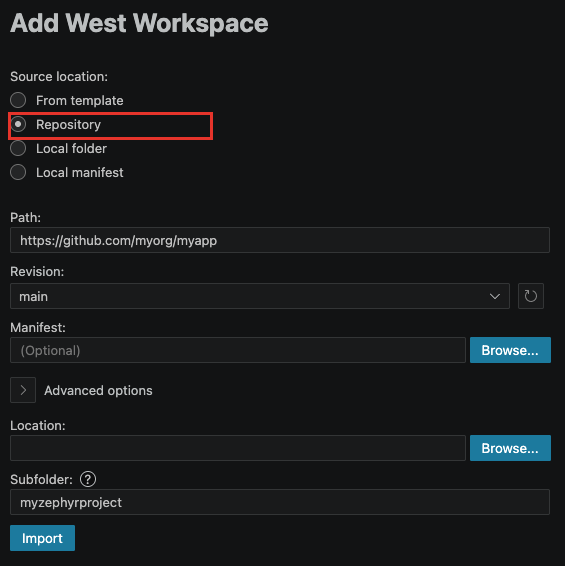
- Repository: import a custom west workspace from a git repository that carries its own
west.yml. This is the usual choice for a project laid out as a west manifest repository (a T2 topology), where the repository'swest.ymlpulls in Zephyr and the modules. The result is a workspace with the same layout you get from the built-in templates.- Path: the repository URL to clone.
- Revision: the branch, tag or commit to check out (defaults to
main). - Manifest: optional. Leave empty to use the repository's
west.yml, or point to another manifest file inside the repository (for examplemanifest/west.yml).
- Local folder: register a workspace that is already initialized and updated on your disk. Select the workspace root (the folder that contains .west).
- Local manifest: initialize the workspace from your own west.yml manifest file.
- Manifest: select your manifest file with Browse....
Revision
The Revision field selects the Zephyr version to check out:
- Open the dropdown: it lists the TAGS and BRANCHES of the repository set in Path.
- The newest release tag is preselected. Pick another entry or type a revision.
- Use the refresh button next to the field to reload the list.
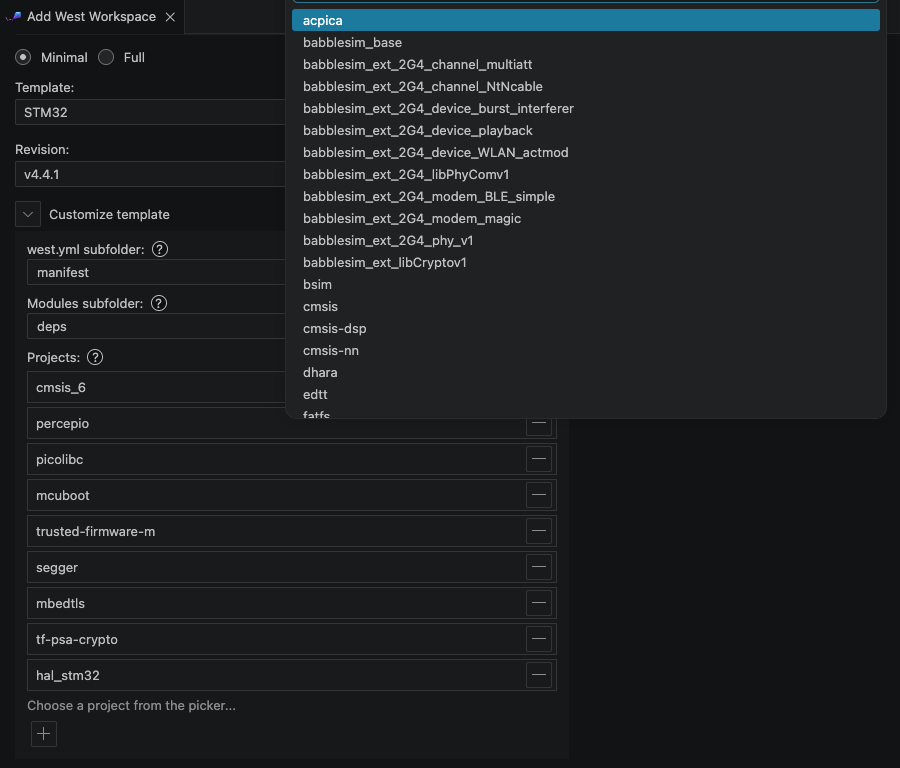
Customize template
This collapsible section appears in From template mode:
- west.yml subfolder: subfolder of the workspace where the generated west.yml is written (default
manifest). Required. - Modules subfolder: subfolder where the Zephyr modules and dependencies are cloned (default
deps). Leave empty to place them at the workspace root. - Projects (Minimal only): the list of projects included in the generated manifest. Defaults come from the selected template. Remove entries you do not need, or click the + button to add other upstream projects for the chosen revision.
Advanced options
- Enable Rust: adds the optional
zephyr-lang-rustmodule so you can build Rust samples. - Create a dedicated Python venv for this workspace: creates a
.venvat the workspace root, shared by all its applications, with west and the Zephyr Python dependencies installed. Leave unchecked to use the global environment. See Python environments. - Fetch west blobs (checked by default): downloads the vendor binary blobs declared by the modules (for example HAL firmware) after the workspace is set up. Requires Zephyr 3.2 or newer (skipped on older versions). On Zephyr 4.2 and newer, click-through licenses are accepted automatically.
Destination
- Location: the parent folder for the new workspace. Click Browse... to pick it.
- Subfolder: the folder created under the Location (default
zephyrproject). Leave empty to use the selected folder directly. Not used in Local folder mode.
Click Import to start.
Import progress
The wizard closes and a progress notification titled Initializing west workspace tracks the import: manifest initialization, project download (with per-project git progress), board discovery, then the optional venv creation and blob fetch. You can cancel the import from the notification.
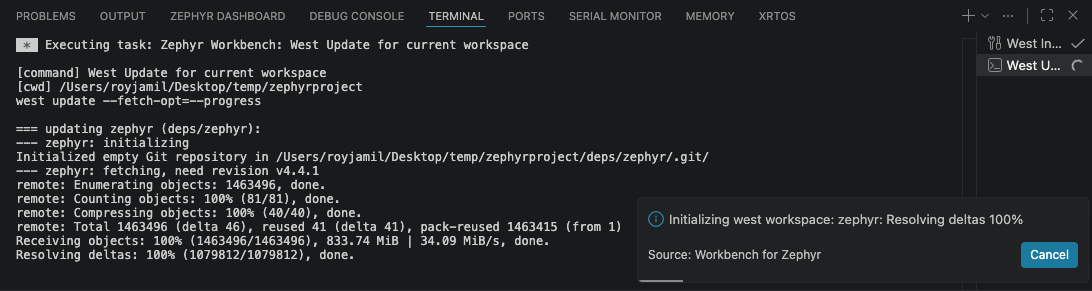
When the import completes, the workspace is added to your VS Code window and appears in the West workspaces view.
If some binary blobs fail to download, the import still completes. Retry later with right-click on the west workspace > Blobs > Blobs: Fetch.
If you experience an issue while importing from Repository with the Python error PermissionError: [WinError 5] Access is denied, it happens when VS Code locks the working directory.
The workaround is to close VS Code, initialize the west workspace manually using west init -m <zephyr_repo_url> --mr <version> <dest_dir>, then import the initialized directory using the Local folder source.
Manage a West Workspace
Each workspace appears in the West workspaces view with its Zephyr version. Expanding it shows:
- Applications: the applications attached to this workspace. When there are several, right-click on an application > Select Application to choose the active one.
- Configurations: the workspace environment variables (see below).
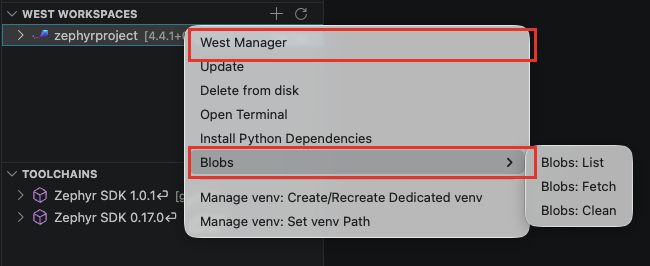
Right-click on a workspace to access:
- West Manager: change the Zephyr revision and the imported modules of the workspace. See West Manager.
- Update: run
west updateon the workspace, then refresh the board list. - Delete from disk: permanently delete the workspace folder from your system (this action is irreversible).
- Install Python Dependencies: install the Python packages required by the workspace. See Python environments.
- Blobs (Zephyr 3.2 and newer):
- Blobs: List: print the blobs declared by the workspace modules in the output panel.
- Blobs: Fetch: download the missing blobs.
- Blobs: Clean: delete the fetched blobs (they can be fetched again later).
- Manage venv: Create/Recreate Dedicated venv, Manage venv: Set venv Path, Manage venv: Remove Dedicated venv: manage the Python virtual environment of the workspace. See Python environments.
- Open Terminal: open a terminal with the build environment and the workspace environment variables already set.
Environment variables
Under Configurations, you can set the BOARD_ROOT, DTS_ROOT, SOC_ROOT, ARCH_ROOT and SNIPPET_ROOT variables to add custom board, devicetree, SoC, architecture and snippet definitions to every build of this workspace.

- Hover a variable row and click the + icon (Add value) to add a path.
- Hover a value to edit it (Edit value) or remove it (Remove value).
- A variable with no value shows
[not set].