Generate and analyze an SBOM (SPDX)
This tutorial walks through producing a Software Bill of Materials (SBOM) for a Zephyr application and analyzing it for vulnerabilities, license issues and metadata quality, without leaving VS Code. For the reference of every command and setting, see SPDX and SBOM.
What you will do
- Build the SPDX documents for your application.
- Run Full SBOM Total to analyze them.
- Read the verdict, the online report and the vulnerabilities.
- Produce a shareable PDF, Word or Markdown report.
Before you start
- A Zephyr application you can build. SPDX is generated from the build output, so
hello_worldis enough.
Workbench for Zephyr supports both SPDX versions. It picks one automatically from your Zephyr tree: if the tree can generate SPDX 3.0 (Zephyr 4.5.0 and newer), 3.0 is used, otherwise 2.3. You do not select a version for the analysis. To work with a specific version on purpose, see Analyze a specific SPDX version.
Step 1: build the SPDX documents
You can let Full SBOM Total build them for you in Step 2, or build them explicitly first:
- In the "Applications" view, right-click on the application > Analysis > SPDX.
- Choose the version to generate:
- Only Build SPDX 2.3: SPDX 2.3 tag-value documents.
- Only Build SPDX 3: an SPDX 3.0 JSON-LD SBOM. It needs Zephyr 4.5.0 or newer; on an older tree a warning offers to generate 2.3 instead.
Both commands run a pristine build and write the documents into the spdx folder of the build directory.
Step 2: analyze with Full SBOM Total
Right-click on the application > Analysis > SPDX > Analysis > Full SBOM Total.
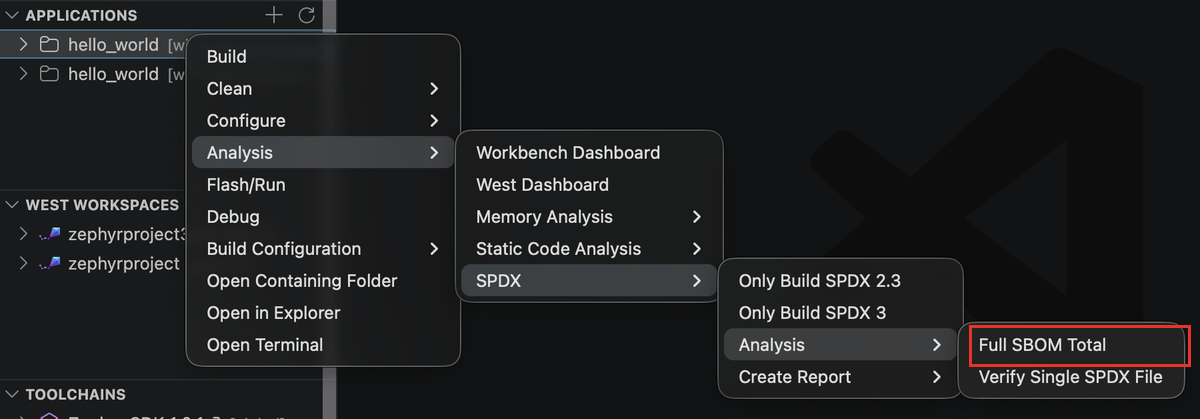
The one command does everything:
- Builds the SPDX documents if they are missing (an existing set is reused).
- Merges them into a single lean SBOM under
spdx/sbom-total. - Uploads it to the SBOM Total service and streams each analysis engine's progress in the notification.
- Shows the verdict.
The progress notification can be cancelled at any time.
Step 3: read the verdict
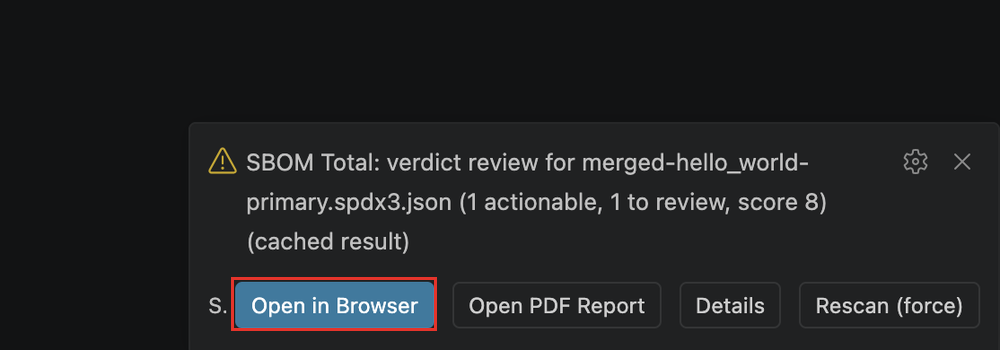
The notification reports the verdict (clean, review or risk), the number of actionable and to-review findings, and the quality score. It offers:
- Open in Browser: the full online report.
- Open PDF Report: download and open the PDF.
- Details: an output channel with the merge statistics, vulnerability triage, NTIA elements and the result link.
- Rescan (force): shown on cached results, re-submits the SBOM. Results are cached by content, so an unchanged SBOM reuses the previous scan and the notification ends with "(cached result)".
The file name in the notification tells you which version was scanned: it includes spdx3 for SPDX 3.0 (for example merged-hello_world-primary.spdx3.json), otherwise it is SPDX 2.3.
Step 4: explore the online report
Click Open in Browser to open the SBOM Total report.
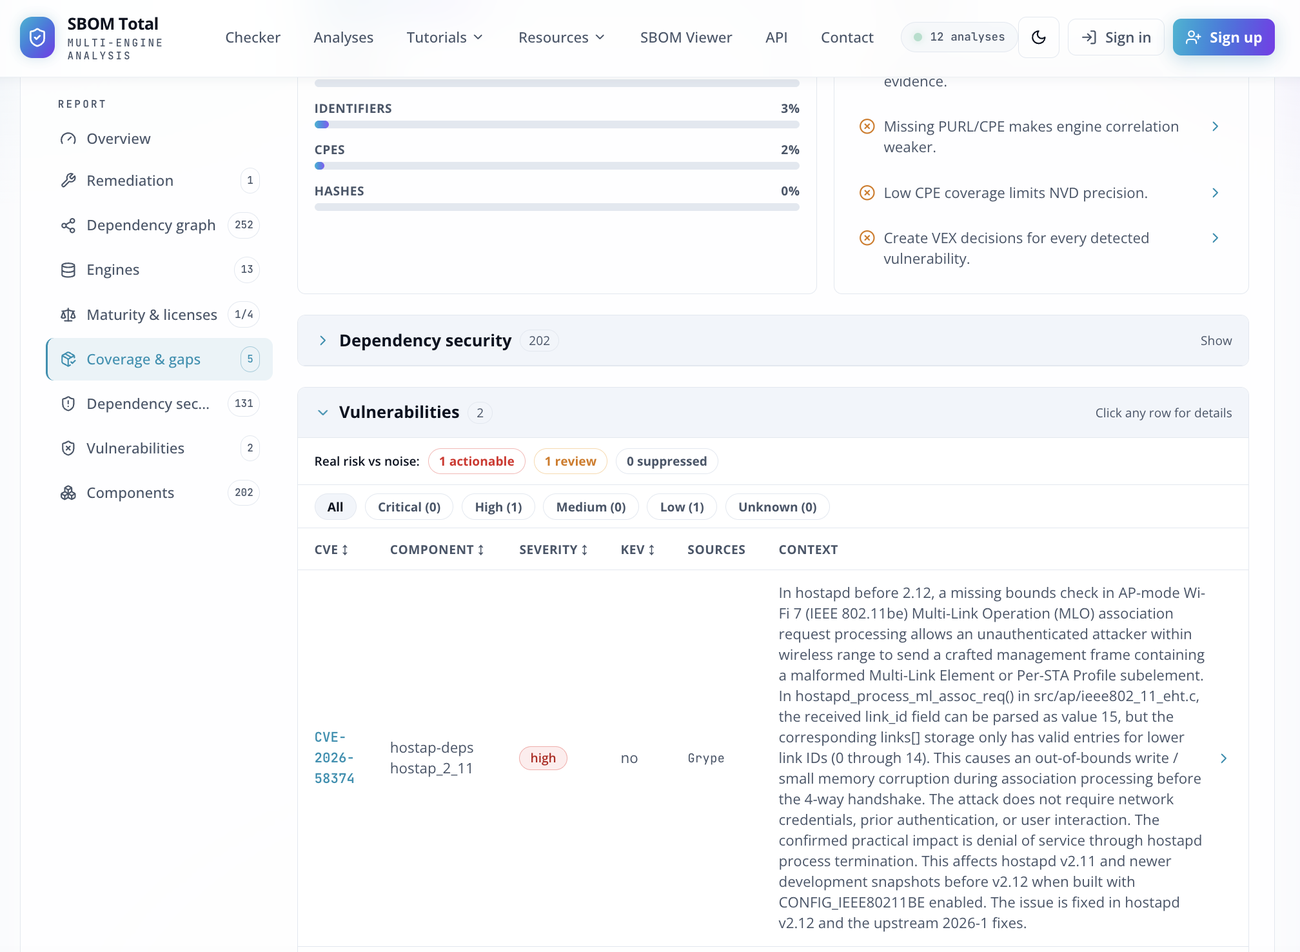
The left menu groups the findings: Overview, Remediation, Dependency graph, Engines, Maturity and licenses, Coverage and gaps, Dependency security, Vulnerabilities and Components. Open Vulnerabilities and click a row to see the affected component, the severity, whether it is a Known Exploited Vulnerability, and the full description.
Step 5: create a shareable report
To hand the results to someone who does not run the scan, right-click on the application > Analysis > SPDX > Create Report, then pick a format:
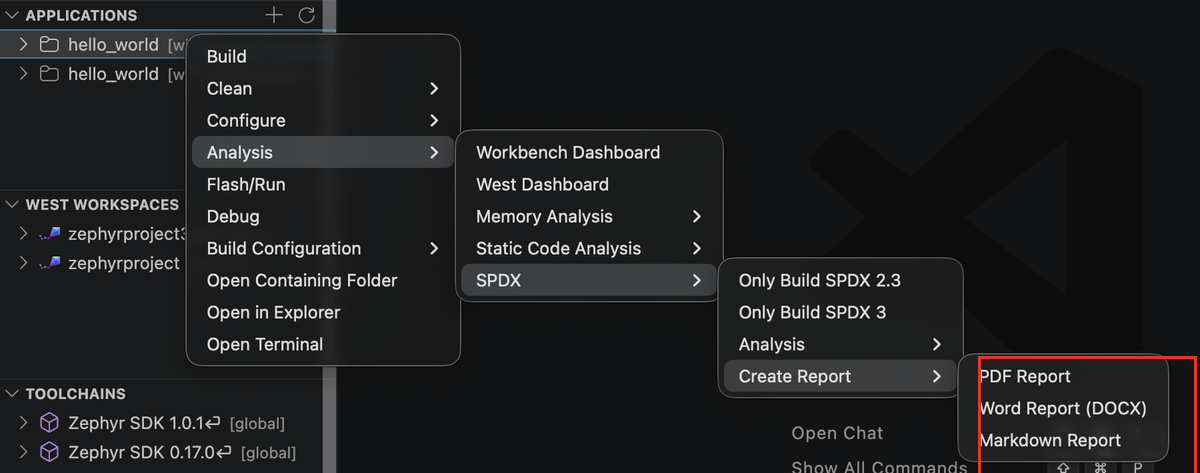
- PDF Report
- Word Report (DOCX)
- Markdown Report
The report reuses the same analysis (a cached scan is just downloaded) and is saved under spdx/sbom-total. Markdown opens in the editor; PDF and DOCX open in your default application.
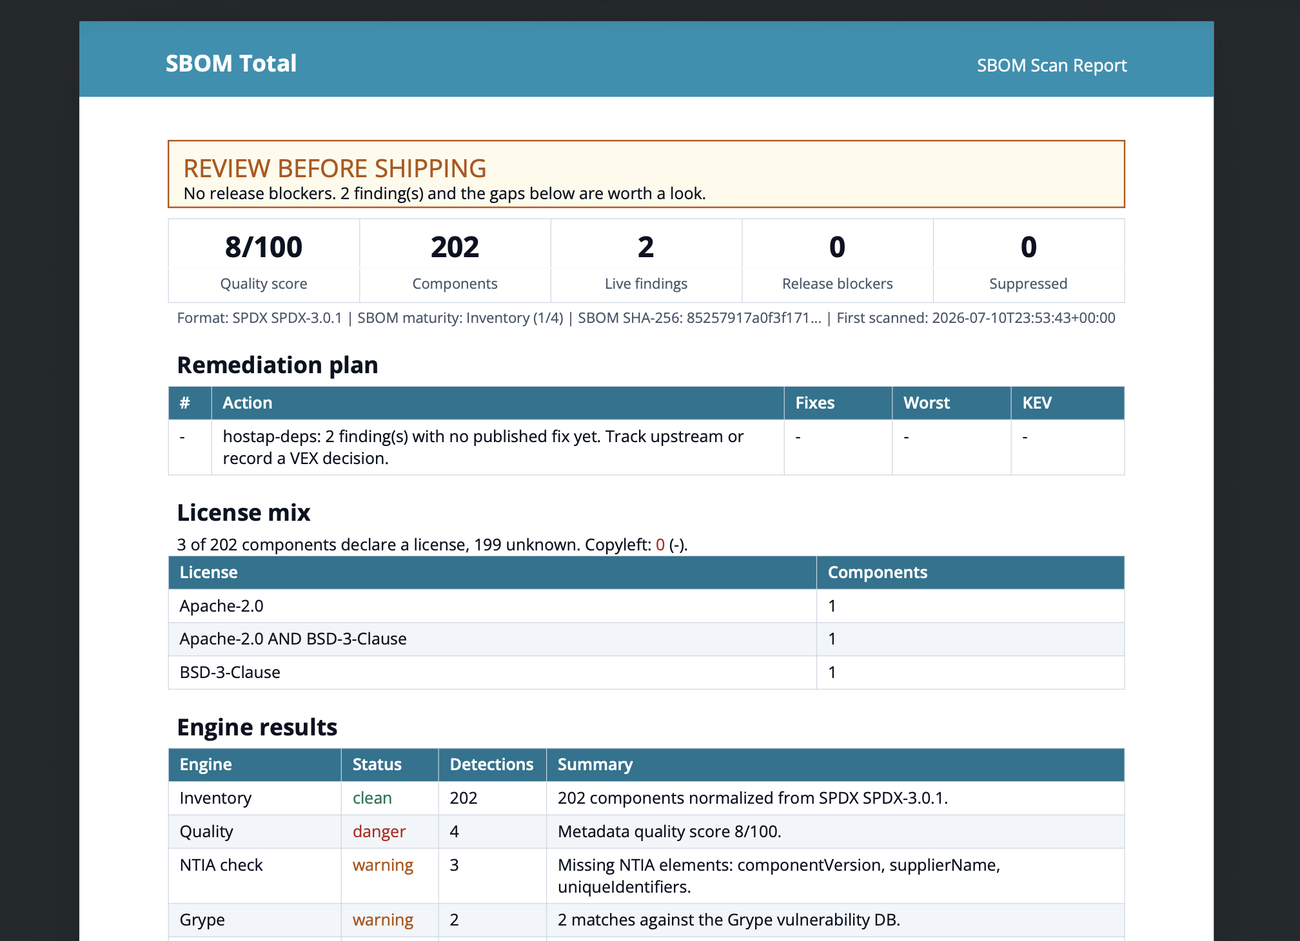
It leads with a "review before shipping" banner and the headline numbers (quality score, components, live findings, release blockers, suppressed), then the remediation plan, the license mix, and the per-engine results. The Format line names the exact SPDX version scanned (for example SPDX SPDX-3.0.1).
Analyze a specific SPDX version
Full SBOM Total always uses the version your Zephyr tree supports. To analyze a version on purpose (for example SPDX 2.3 on a tree that also supports 3.0):
- Build that version with Only Build SPDX 2.3 or Only Build SPDX 3 (Step 1).
- Right-click on the application > Analysis > SPDX > Analysis > Verify Single SPDX File.
- Pick the generated document (
.spdx,.jsonor.jsonld) in the build'sspdxfolder.
It is checked against the service and reported with the same verdict notification.